


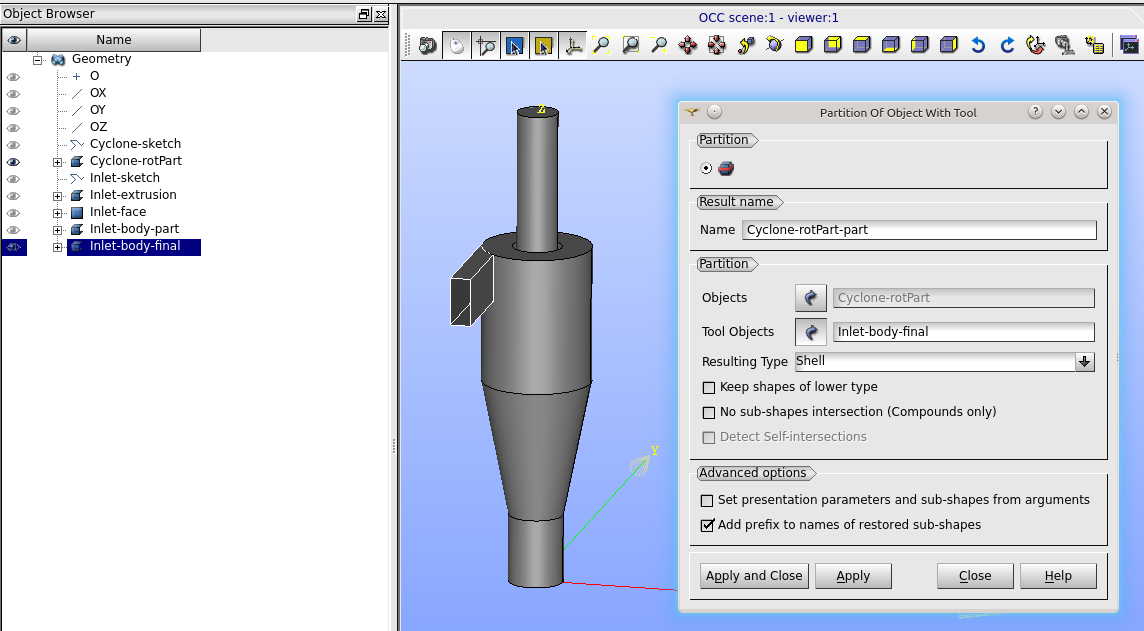
Navigate to the menu Operations > Partition and set the following entries (see Fig. ![]() ):
):
- Set the Name to Cyclone-rotPart-part.
- Set Objects to Cyclone-rotPart.
- Set Tool Objects to Inlet-body-final.
- Resulting type is Shell.
- Click Apply and Close.
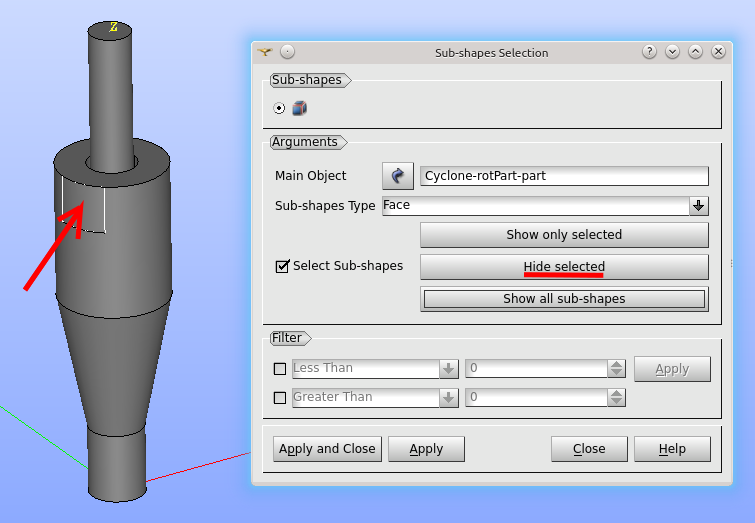
Navigate to the menu New Entity > Explode and do following steps (see Fig. ![]() ):
):
- Set Main Object to Cyclone-rotPart-part.
- Check the Select Sub-Shapes option.
- At first, check the face denoted by red arrow in Figure
 – left image and click Hide selected.
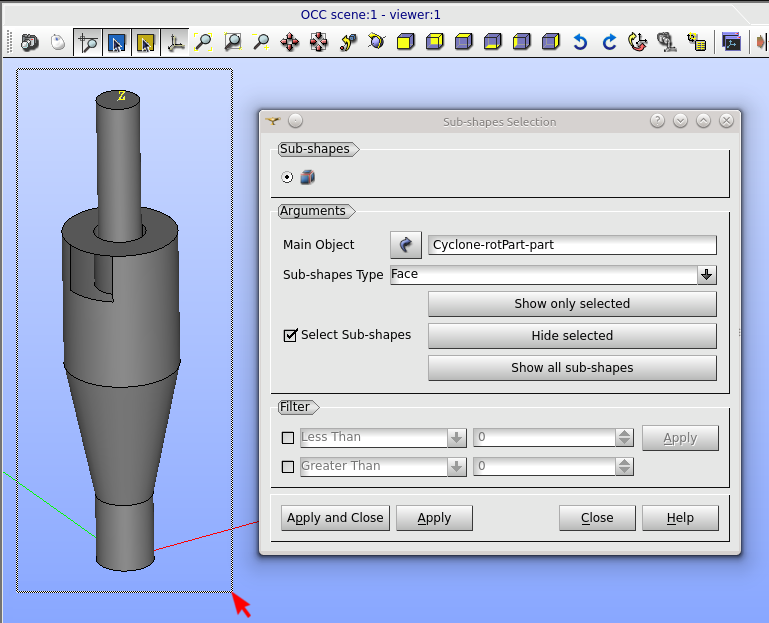
 - Afterwards, denote all faces by dragging the mouse over whole geometry (see Fig. – right image).
- Click Apply and Close.
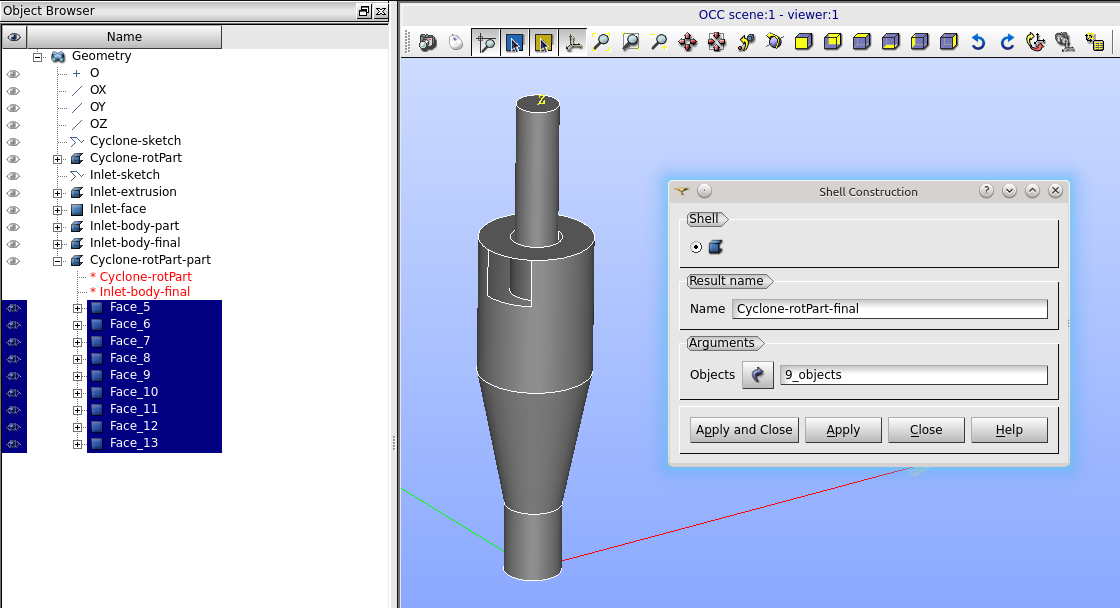
Finally, navigate to the menu New Entity > Build > Shell and follow these steps (see Fig. ![]() ):
):
- Set the Name to Cyclone-rotPart-final.
- In the Objects select the faces.
- Click Apply and Close.